부스트 코스 proj4-1를 진행하였습니다.
개발해야하는 파트는 네이버 예약 서비스의 상세 페이지의 백엔드 파트였습니다.
개발해야하는 기능은 상품에 대한 상세 페이지인 main view와 상품에 대한 한줄평을 볼 수 있는 comment view와 상품에 대한 displayInfo를 구할 수 있는 api를 만드는 것으로 총 3가지 였습니다.
displayInfo api(/api/products/{displayInfoId})
displayInfo api에는 많은 정보가 들어 있습니다.
spring MVC에 따라 개발해야 보겠습니다. dto -> dao -> service -> controller
model(dto)을 구성해야 하므로 이에 따라 만든 model 목록입니다.
- Comment
- CommentImage
- DisplayInfo
- DisplayInfoImage
- ProductImage
- ProductPrice
사용한 테이블들 입니다.
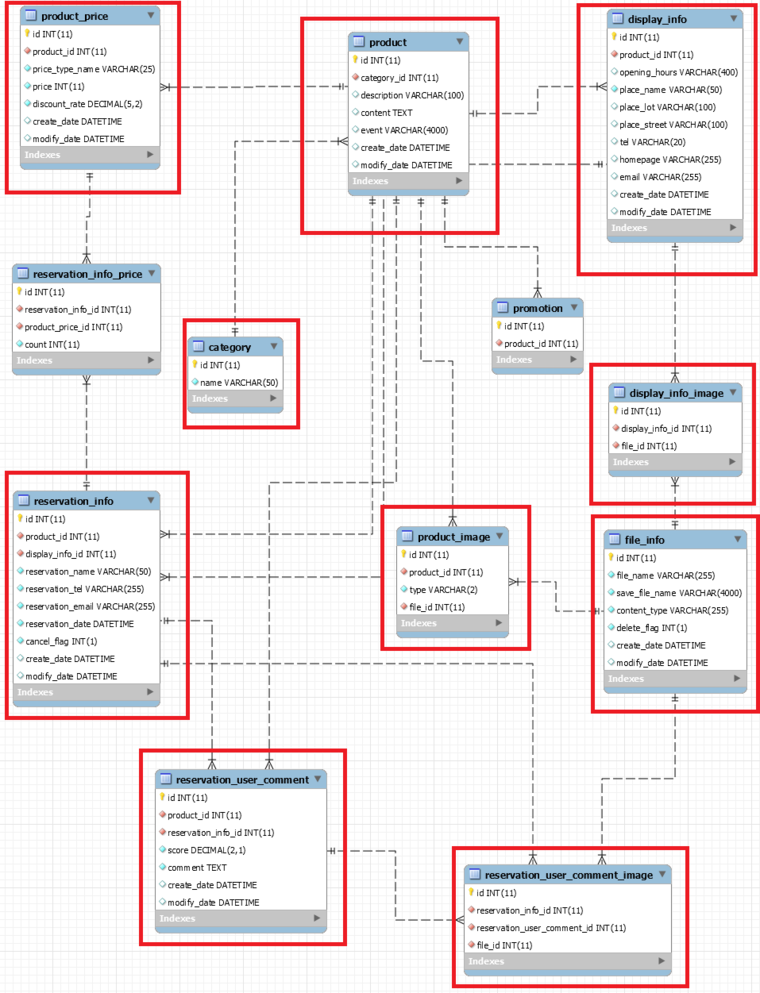
꽤 많았습니다.(사실 너무 많았….)
데이터 베이스의 테이블을 이용해 위의 모델 객체를 만들 수 있게 도와주는 dao가 있어야 됩니다.
각 모델이 가지고 있는 속성에 따라 필요한 테이블을 join해서 모델 객체를 만들어 주어야 합니다.
- DisplayInfo : public DisplayInfo selectDisplayInfo(Integer displayInfoId)
- DisplayInfoImage : public DisplayInfoImage selectDisplayInfoImage(Integer displayInfoId)
- Comments : public List
selectComments(Integer displayInfoId) - CommentImages : public List
selectCommentImages(Integer reservationUserCommentId) - ProductImages : public List
selectProductImages(Integer productId) - ProductPrices : public List
selectProductPrices(Integer productId)
위의 함수들로 객체를 생성합니다. 현재 조회하는 기능만 있으면 되므로 수정, 삭제 기능을 담당하는 함수는 만들지 않았습니다.
자 이제 service차례입니다.
    @Override
    @Transactional
    public Map<String, Object> getDetailDisplayInfo(Integer displayInfoId) {
        displayInfo가져오기//selectDisplayInfo
        displayInfoImage가져오기//selectDisplayInfoImage
        productImages가져오기//selectProductImages
        productPrices가져오기//selectProductPrices
        comments가져오기//selectComments
        각 comment의 id에 맞는 commentImage가져오기//selectCommentImages
    }
@Transactional annotation을 사용하면 함수가 실행되거나, 중간에 문제가 생기면 아예 함수를 실행하기 전으로 rollback하게끔 도와줍니다.
이번 과제 명세 중 하나가 사용자 email을 dkwo****와 같은 형식으로 표현하는 것이였는데, 저는 프론트에서 해결하였었습니다. 하지만 리뷰어님께서 보통 많은 페이지들에서 이메일을 저런 식으로 표현해야하기 때문에 프론트마다 코드를 만들기 보다도 백엔드에서 처리해주어 처리 포인트를 1개롤 모으는 것이 보통이라고 하셨습니다. 따라서 comment마다 commentImages를 가져올 때, comment의 이메일 형식도 바꿔주는 것으로 바꾸고 프론트는 단순 출력만 하게 수정하였습니다.(또 하나 배웠습니다. 크흡…..)
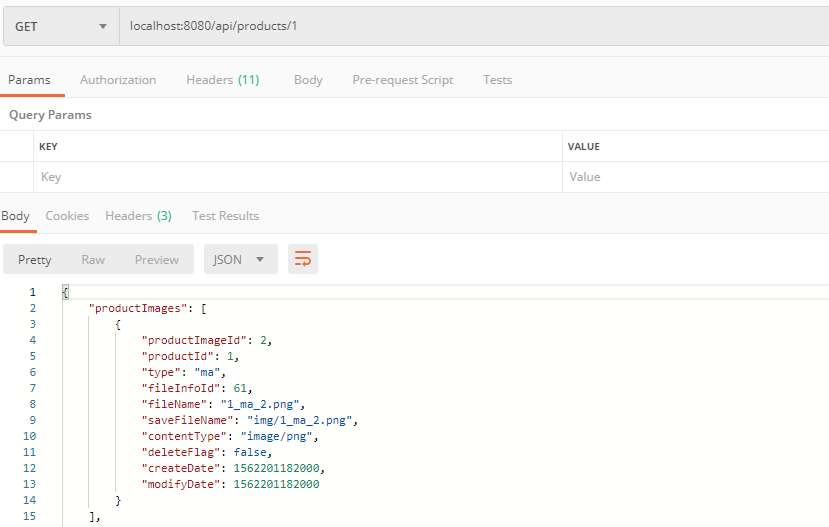
서버를 실행하고, postman에서 api url에 요청해본 결과입니다.
상세 페이지(main view)
위의 displayInfo api에서 controller를 제외한 mvc모델을 다 만들어 놨기 때문에, 상세 페이지와 한줄평 페이지 view는 굉장히 간단해 졌습니다.
service의 getDetailDisplayInfo함수를 이용해 필요한 정보를 받아와 modelMap객체를 통해 detail.jsp에 넘겨 줍니다.
대략적인 코드는 다음과 같습니다.
@Controller
@RequestMapping(path = "/detail")
public class DetailController {
    @GetMapping
    public String renderDetailPage(@RequestParam(name = "id") int displayInfoId, ModelMap modelMap) {
        getDetailDisplayInfo호출
        modelMap에 displayInfo주입
        return "detail";
    }
}
한줄평 페이지(comment view)
상세 페이지와 비슷합니다. getDetailDisplayInfo를 이용하면 불필요한 정보까지 받아오므로 비효율적입니다. 따라서 추가적으로 getDetailComments()함수를 만들어 주었습니다.
이 데이터 또한 modelMap객체를 통해 comment.jsp에 넘겨줍니다.
@Controller
@RequestMapping(path = "/comment")
public class CommentController {
    @GetMapping
    public String renderCommentPage(@RequestParam(name = "id") int displayInfoId, ModelMap modelMap) {
        getDetailComments호출
        modelMap에 comments주입
        return "comment";
    }
}
새롭게 배운 점
spring MVC에서 view를 넣으려면 jsp파일을 만들고, controller도 만들어야 되죠.
원하는 url에 view하나 넣을 때마다 controller를 만들어 넣어야하는 건 굉장히 부담스러운 일입니다.
원하는 url에 정적인 페이지를 넣고 싶을 때는 WebMvcConfigurerAdapter클래스의 addViewControllers를 override해서 간단하게 view를 등록할 수 있습니다.
@Configuration
@EnableWebMvc
@ComponentScan(basePackages = {"kr.or.connect.mavenweb.controller"})
public class WebMvcContextConfiguration extends WebMvcConfigurerAdapter {
    @Override
    public void configureDefaultServletHandling(DefaultServletHandlerConfigurer configurer) {
        configurer.enable();
    }
    @Override
    public void addViewControllers(final ViewControllerRegistry registry) {
        System.out.println("addViewControllers가 호출됩니다. ");
        registry.addViewController("/").setViewName("index");
    }
}
사실 이 configure부분이 서버에 대한 이해도가 낮으면 굉장히 코드 한줄 한줄을 이해하기가 힘듭니다.
조금이라도 분석을 해봅시다.
configureDefaultServletHandling(DefaultServletHandlerConfigurer configurer)- 기본적으로 설정은 DispatcherServlet이 읽어 들입니다.
- url요청이 들어왔을 때, DefaultServletHttpRequestHandler가 원래 처리합니다.
- 위와 같이
configurer.enable()로 configurer를 허용해주면, mapping이 없는 URL요청이 들어왔을 때 DefaultServletHttpRequestHandler가 요청을 DefaultServletHandler에 넘기게 되고 DefaultServletHandler는 WAS의 static한 자원을 읽어서 보여줍니다.
addViewControllers(final ViewControllerRegistry registry)- ViewControllerRegistry객체를 이용해 특정 URL에 대한 처리를 controller없이 할 수 있습니다.
- 위와 같이 registry에
addViewController()함수를 이용하면/URL에 index라는 view를 보여줄 수 있게됩니다.
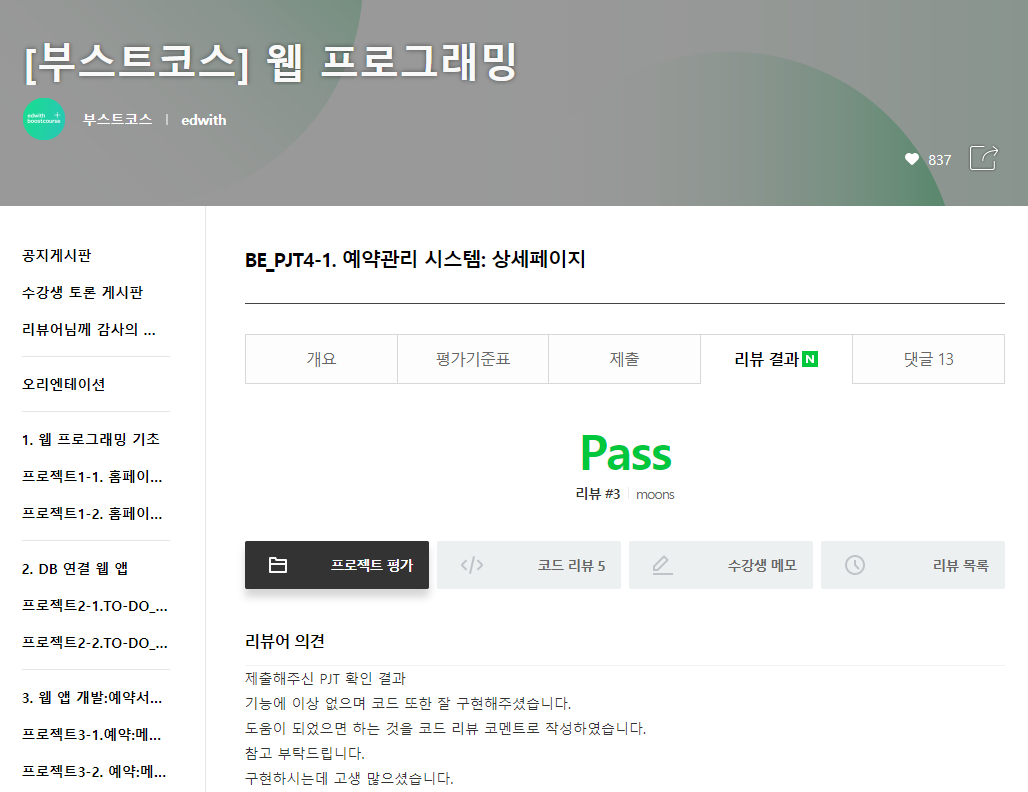
프로젝트 완료한 모습입니다.
#부스트코스